Views: 0 Author: Site Editor Publish Time: 2026-08-28 Origin: Site

A silent timer can ruin dinner, study time, or an important classroom activity. Fortunately, many failures come from incorrect winding, dirt, or poor placement.
This guide explains how to fix a mechanical timer through safe, practical checks. You will learn how to diagnose symptoms, clean it, test accuracy, and recognize permanent damage.
A portable mechanical timer stores energy inside a wound spring. Gears release this energy slowly, while an escapement creates the familiar ticking sound. At zero, a cam usually releases a small hammer or bell mechanism. A problem anywhere along this path can stop the countdown or alarm.
This guide mainly covers portable, spring-wound kitchen, study, and visual timers. They usually need no battery or electrical supply. GreatHome include battery-free 60-minute models for kitchens, classrooms, homes, and offices.
Plug-in, appliance, and wall-mounted mechanical timers are different. They may contain line-voltage wiring and motor-driven parts. Unplug them before any external inspection. Ask a qualified electrician to handle covers, terminals, or internal wiring.
Start by observing the timer for one full minute. Listen for ticking and watch the pointer or visual disc. Then use this table to choose your first check.
A recent fall may shift the dial, bell, or gear shafts without leaving visible damage. Ask when the failure started and note any impact, moisture, or unusual resistance.
Symptom | Likely Cause | Safe First Check |
No ticking | Insufficient winding or a jammed mechanism | Wind it correctly and place it upright |
Ticks but never rings | Alarm was not engaged during setup | Fully wind it before selecting a short time |
Stops before zero | Weak spring, friction, dirt, or poor placement | Retest on a level surface |
Runs fast or slow | Impact damage, drag, or worn gears | Compare a 10-minute run against a stopwatch |
Dial feels stuck | Debris, a shifted dial, or internal damage | Stop turning and inspect accessible edges |
Never force a resistant knob. Extra pressure can strip a plastic gear or detach the spring. A broader Mechanical Timer Not Working? Fix It Fast with These 5 Reasons also covers powered timer switches, but electrical repairs need separate precautions.
Incorrect setup causes many reports of a mechanical timer not working. Short intervals create the most confusion. The dial may show five minutes, yet the alarm spring never received enough energy.
Check your model instructions before turning anything. Directions can vary between products. Many 60-minute kitchen timers use this sequence:
1. Return to the starting position gently. Align the pointer near zero without pushing beyond its normal stop. If it resists, leave it alone and check the manual.
2. Turn clockwise to the full-scale mark. Most models use 55 or 60 minutes. Use smooth, even pressure, then stop at the printed maximum.
3. Turn counterclockwise to the desired interval. For a ten-minute test, align the pointer carefully at ten. The countdown should begin immediately.
4. Place it upright on a stable surface. Keep the timer away from vibration, steam, and direct oven heat. Magnetic models need a flat steel surface for secure placement.
This routine winds the timing spring and usually engages the alarm. It often fixes a mechanical timer that ticks quietly but will not ring. Never twist past the maximum mark because overwinding can damage the spring.
Set ten minutes and start a phone stopwatch at the same moment. Watch for smooth pointer movement, steady ticking, and a clear alarm near zero. A small difference may be normal, since mechanical timers are not precision laboratory instruments.
Repeat the test once before judging the result. Use the same position and setting each time. GreatHome has developed clocks, timers, and counters in Fuzhou since 2008, so its Chess Timers & Competitive Equipment Manufacturer - GreatHome supports model-specific setup questions.
Record repeated errors instead of adjusting the pointer yourself. Consistent drift suggests wear or calibration trouble. Random stopping usually points toward dirt, impact damage, or weak spring torque.
Kitchen grease, flour, dust, and crumbs can gather around a rotating dial. They add friction and may make the mechanical timer dial feel stuck. Cleaning helps only when contamination remains near accessible surfaces.
First, let the timer run down completely. Move it away from food, water, and heat. Wipe the case using a soft cloth, slightly dampened when necessary.
Hold the timer so loose debris falls outward. Use a soft brush around the dial gap, bell opening, and case seams. A manual air blower can loosen dry dust without adding moisture.
Avoid these common mistakes:
Do not immerse the timer. Water can corrode the spring and gears. It may also weaken printed markings or enter the bell chamber.
Do not spray cleaner into openings. Solvents can damage plastic, paint, or factory-applied lubricant. Aerosol pressure may push debris deeper inside.
Do not add cooking oil or general household oil. Thick oil attracts dust and slows small gears. Excess liquid can also silence the alarm.
Do not pry open a sealed case. A tensioned spring can release suddenly. Opening it may break clips, change alignment, or cancel warranty support.
These limits match common mechanical timer care instructions, which recommend a soft damp cloth and dry storage. Manufacturer guidance should always override general cleaning advice.
Let any surface moisture dry fully before winding. Perform the ten-minute stopwatch test again. Listen for irregular ticking, scraping, or sudden silence.
If cleaning restores movement, run two more cycles. Reliable repetition matters more than one successful countdown. Stop using the timer when it stalls again, feels rough, or shows moisture beneath the dial.
A dirty exterior is user-serviceable. Internal corrosion, bent shafts, and broken gear teeth are not. Those faults normally require factory service or replacement.
Symptoms reveal which part of the sequence has failed. Work through one symptom at a time. Changing several things together makes the true cause harder to identify during each controlled test.
Repeat the full-wind method, then set ten minutes. Confirm the timer stands upright and the dial is not rubbing against the case. Look for crumbs or a bent pointer around accessible edges.
Stop if the knob feels locked or slips freely. A locked knob can indicate jammed gears. A loose knob may indicate a disconnected shaft, stripped gear, or broken mainspring.
Wind the dial to its maximum before returning to a short interval. This action often engages the alarm mechanism. Check visible bell openings for paper, grease, or other obstructions.
Do not insert metal tools into the case. They may bend the bell hammer or scratch nearby parts. If the countdown reaches zero silently after two correct tests, the alarm mechanism likely needs service.
Retest it upright on a level counter. Then repeat using a longer setting, such as 30 minutes. A timer stopping only near zero often has weak spring torque or excessive internal friction.
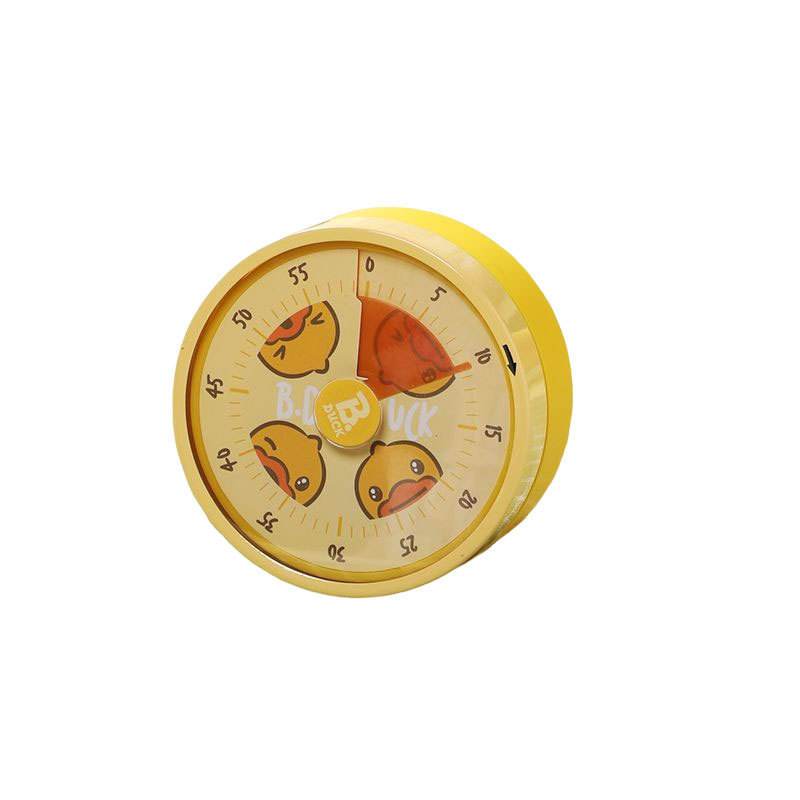
Observe a visual countdown disc where available. If the disc and pointer stop together, the gear train has stalled. If the disc moves but the alarm fails, the fault is probably near the bell.
Compare three identical ten-minute cycles against a stopwatch. Write down each result. Similar errors suggest calibration drift, while inconsistent errors suggest sticking or damage.
A dependable mechanical model should turn smoothly, show remaining time clearly, and finish each cycle consistently. When those functions remain unreliable after proper winding and cleaning, internal repair may cost more than replacement.
Simple mechanical timer repair should remain simple. Correct setup, dry cleaning, stable placement, and a controlled accuracy test are reasonable home checks. Spring replacement, gear alignment, and escapement adjustment require small parts, proper tools, and model knowledge.
Replace the timer when you find any of these signs:
The dial slips, locks, or requires force during every setup.
The case is cracked, warped, melted, or damaged by a fall.
It repeatedly stops before zero after correct winding and cleaning.
The alarm remains unreliable during several controlled tests.
Scraping, rattling, or loose internal parts appear during movement.
A plug-in or wall timer shows heat damage, arcing, or burnt odor.
Disconnect an electrical timer immediately after overheating or erratic switching. Do not depend on it for heaters, pumps, fans, or other connected loads. A qualified electrician should inspect the circuit and install the correct rated replacement.
Wind portable timers gently and follow their exact setup sequence. Store them somewhere dry, clean, and protected from drops. Keep them away from steam, flour, grease, strong magnets, and hot appliance surfaces.
Test accuracy monthly when timing affects food quality, lessons, or work routines. For heat-sensitive or safety-critical tasks, use a second independent alarm. No inexpensive countdown timer should be the only protection against fire, overheating, or equipment damage.
Keep the receipt, model number, and operating sheet. Those details speed warranty claims and prevent ordering an incompatible replacement.
For bulk sourcing or model guidance, GreatHome helps buyers choose battery-free designs. These products suit kitchens, classrooms, offices, and visual timing needs. Ask for operating directions, alarm expectations, mounting details, and warranty terms before purchase.
Good maintenance cannot reverse a cracked gear or tired spring. However, correct winding and careful storage prevent many avoidable failures. They also make genuine wear easier to recognize.
Most mechanical timer problems begin with incorrect winding, unstable placement, or surface debris. Reset it fully, clean it carefully, and compare several cycles against a stopwatch.
Replace timers showing weak springs, damaged gears, unreliable alarms, or electrical faults. A dependable timer should move smoothly, count consistently, and signal every completed interval.
A: Wind it fully, then return the dial to your chosen interval.
A: Poor winding, dirt, placement, or a weak spring may cause stalling.
A: Follow manufacturer instructions. Never spray household oil inside.
A: Compare three identical ten-minute cycles against a phone stopwatch.
A: Replace it after repeated stalls, unreliable alarms, damage, or overheating.